Saturday, November 24, 2018

Black Friday Deal!

NP205 Transfer Case... CHECK!

So I found a local guy trying to offload a nice NP205 transfer case. These things are all gear driven, high spline count monsters capable of serious offroad and customization. Not bad for $200!


I plan to rebuild it and possibly upgrade the gear ratios for a lower low. I KNOW I'll be adding a Doubler from JB Custom Fab.

This thing will allow me to do things like 2WD low for on hwy hill descents, FWD high or low for performing digs, and double my gear ratio for even lower CRAWL speeds. Can't wait! I may end up duplicating this setup on my FJ40 by using an SM465 transmission and a Chevy NP205. Someday.

I know I'll be adding a Winters Shifter to the Bronco as well. This will give me better control of the transmission than the traditional column shifter.


However, I am planning on putting the Bronco away for a while and focus my attention on the Bighorn Cruiser.

EL DORADO CANYON RUN

Took BB out with my Land Cruiser Club to Tackle El Dorado Canyon.


Keeping up with these BUILT Land Cruisers was a chore for my poor old stock height Bronco. It took a lot of work from a couple of very experienced spotters/rock placers to make it through.


It was 10 miles over four hours on cat 2/3 trails. What a great day!


The new bumper held up well, with only some minor scrapes.


One thing is painfully clear. I need some lift and bigger tires... and bigger gears... and stronger driveshafts... and better transfer case and transmission... and... and... and... :)

Tuesday, November 6, 2018

Maintenance and Stuff

Maintenance and a Little Customization


I got the Bronco all back together and ready for the trail! On my way to meet the club and the engine starts overheating... 😣

My final trip of the year was foiled by a bad fan controller that is less than a year old. Of course it was a special order part, so after all the hard work and rushing to get the Bronco trail ready, she sat in the driveway again for a week. Here is the culprit to my wows...


I decided I wouldn't let a bad controller stop me in the future and ordered a manual switch. I got started on the wiring harness, but they didn't supply enough wire. So for now the interior work is complete and I'll finish up the harness soonish.


It didn't run out exactly how I wanted due to the indent where the mic mount is located. I will most likely cut out a bit more of the opening and add three more rocker switch blanks. I'll relocate the mic elsewhere. Future toggles will be roof lights, back up lights, and fog/bumper lights. The last one will remain blank until I get my winch bumper and winch.


I changed the oil after using the BG EPR crankcase flush. I was impressed! It pulled sludge out into my drip pan and I could feel and hear the difference in the engine. I am thinking about adding there MOA additive as well, but I am not a huge believer of engine additives. We'll see.


I'll be adding the 44K into my fuel system when it arrives. I also swapped out the fuel filter and fuel pressure regulator to see if it would help with some of the cold start and rough idle issues I have noticed. It certain did help with the cold start/choke issues and man the thing runs smooth! I do still notice a bit of a stutter at idle. Enough to see the RPM gauge bounce ever so slightly and hear a rhythm in the engine cycle. It bugs me! I'll be swapping out sensors and modules next. I'll start with the ignition control module, then the Idle Air Control Motor, Throttle Position Sensor. I'll then move on to the MAP Sensor, Ambient Air Temperature Sensor, Coolant Temperature Sensor/Sender, and I might as well do the Barometric Pressure Sensor while I am at it. If those don't solve the issue, then I'll swap out plugs, wires, coil and possibly the entire distributor. With the exception of the distributor, the rest of the ignition system is about a year old.

Once all that not so much fun stuff is complete, I'll be turning my attention to wheels, lift, and slapping on my BFG 35" mud tires. Then it'll be on to not so much fun stuff like rebuilding and upgrading both axle assemblies, brakes. Then back to some fun stuff like finishing off the rear bumper with spare tire carrier and Jerry Can/basket carrier. Here's some inspiration for me to keep going on this build...


This grey and black Bronco is almost exactly what I had envisioned for my Bronco. I am really loving the orange on this one though. We'll see. I'd prefer a tan/khaki interior and mine is black and grey.


Tuesday, October 23, 2018

Progress...

Bumper's Done! Lizard Skin Rounds 1 & 2 Are Done!

Alright! I got the bumper finished and mounted. It looks pretty good if I do say so myself. I need to do something with the gap and I need to tidy up the tow harness and and license plate lights. I'll also drill a new set of holes on the shackle hitch to get it recessed further into the receiver.


I got the first and second coat of Lizard Skin Sound Control on the interior. It isn't perfect, but it should still make a noticeable difference in the noise.


I also finished my Kryptek Typhon camo headliner. I need to do some glue touch up in a couple of spots, but it should work out well. I plan to use the same pattern in a vinyl wrap applied to the top of the dash and on some trim pieces. A company even sells custom fitted seat covers in the same pattern. I don't know if I'll go that far, we'll see.


Up next will be two coats of the Lizard Skin Ceramic Insulation which is designed to reduce sound into the cab. Some pretty cool stuff! Check it out...


After that has cured, I'll apply the Lizard Skin Topcoat on the floor boards and start reinstalling my interior. I hope to have it done Friday evening.


Sunday, October 21, 2018

Rear Bumper & Interior Stuff

Squeezing in Some Work Before Winter

So I planned on having all of this finished before the big club run on the 27th (next weekend) and I began ordering parts a month ago... But, I apparently I still haven't learned my lesson when it comes to timing. The plan was to have the bumper on by now and the interior finished by midweek. That doesn't appear to be possible at this point. I prepped the Bronco interior and pulled the old bumper weeks ago. Here's where I started...

The rear bumper was seriously out of whack after the last run up Peavine Mtn. and needed to be replaced.


I got the bumper off and got a little silly with my angle grinder and cutoff wheel. The rust is almost complete on the bottom of the tailgate and it too will need to be replaced... someday.


I gutted the interior and masked off the areas I didn't want covered in primer and Lizard Skin. I covered the door cards too, but after this photo was taken.

I cleaned, sanded, cleaned... degreased, and prepped the metal. I sprayed the epoxy primer yesterday. I also coated the door sills and corners of the rear passenger floor pans with POR15 to stop and prevent rust.

I decided to go with the Rock Solid Bumper by Protofab4x4.com. It is a 108lb 1/4" plate steel beast!


Unfortunately, the tire rack and jerry can version would have taken too long to build, so I decided I'd retrofit them later on.


I sprayed the primer yesterday.


This is the finished underside of the bumper. I used Raptor Liner with an HPLV spray gun and a 2mm tip. I really like the texture! Here's a close up...


I saw a gal on youtube called Unstoppable Morgan do an American Flag headliner for her Bronco and decided I'd give it a shot myself. This is called Kyptek Typhon and it is a specialized camouflage that matches the black and grey motif already in my Bronco. 


A little 3M headliner and fabric adhesive, my wife's ironing board and iron and there ya have it! I need to tough up a few areas where not enough glue was used, but otherwise this should look pretty cool! I'll be using vinyl wrap with the same pattern for the top of the dash and some of the dash trim. A company also makes custom fit seat covers in this pattern, but I am not sure if that will be a little too much Typhon. We'll see.

Up next...

I'll post the bumper and Lizard Skin results later this week.


Sunday, July 22, 2018

Beating the Beater up on Peavine Mountain

Peavine Mountain Nevada-to-Verdi Mountain, CA


So I met a former resident of the house we live in a while back. Turns out he was and avid off-roader with 97 FJ80. He has since sold[out] 😂 it for a 2018 4Runner.We decided to hit Peavine Mountain, which is literally in our back yard and it was time to explore!

I almost rolled the Bronco off one of the ridgelines! That was fun... We traversed desert, mountain, forest, creeks, meadows, canyons, and valleys. It was a wonderful trip and the only casualty was my [already broken and Jerryrigged) passenger side mirror, a lot more desert pin stripping and A LOT more character to my already damaged rear bumper!

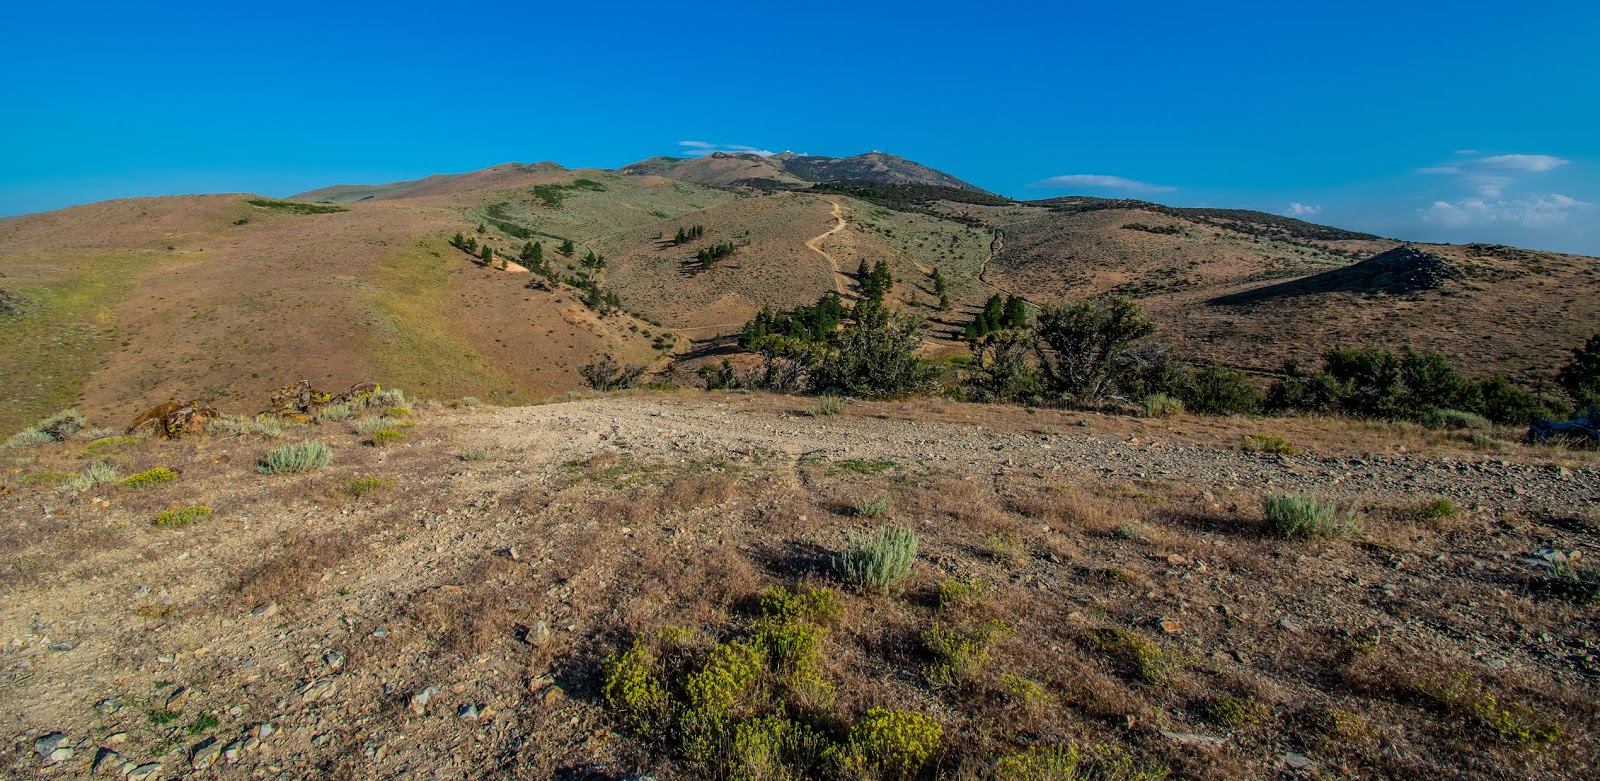
The view at the summit of Hobo Trail

Heading NW from Hobo Trail toward Peavine Peak. 
You can see the ridgline where I almost rolled dead center on the mountain. 

Along Peavine Road to on our way to the summit


The view from the top! Reno from 8,203 feet

Sun Valley from the top

 Heading West toward California.

An interesting rock formation as we enter the Meadow Valley


A water obstacle. My old Bronco needed brute force to get through it on my AT tires.
 Jim's 4Runner crawled through it with style and grace.

This is Long Valley, Dog Valley from Verdi OHV.
We drove through it on our way home this time.
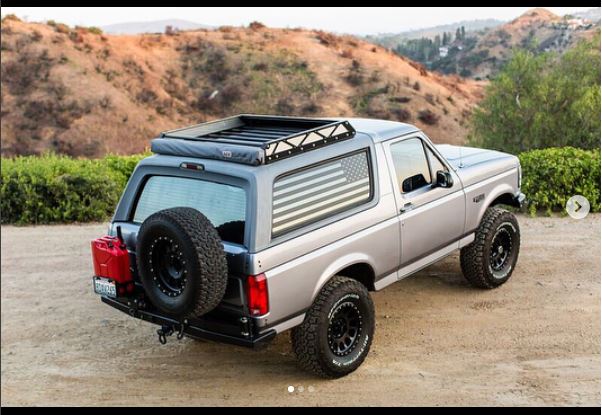
The Aftermath!

 Here are a few shots of the Bronco post trail.

A little more desert pinstripping

And the BUSTED mirror!

VERY bent bumper!

I really need to get this thing replaced now.

Redneck Mirror Fix Round 3!

I am not quite ready to buy another mirror, so bungees, a clamp, and some E9000 cement stuff should hold it on a bit long.


The thunderstorms did a fair job washing the grime off the Bronco, but I'll take a trip to the DIY car wash to pressure wash the under carriage and Kelly has promised to help me clean out the interior this week.

Up Next: Nothing for a while. I need to focus on the Bighorn for a bit. Though a trip up to Sunflower Mountain and into the Mnt. Rose Wilderness via Hunter Creek may be in the near future.

Tuesday, July 17, 2018

Up, Up, Up The Mountain!

Second Attempt to Beacon Point on the Verdi Range

I had made this attempt from the other side of the mountain in my pretty 2016 F150 and decided to not risk the paint job. This time I took the Beater Bronco! Aaaand I still couldn't get to the top! The access road I chose, the one on the East side of the peak was fully overgrown and impossible to use. So I stopped at about 6,800 feet and snapped a few cell phone shots. Then I backed down a narrow trail to the last turn around, which was a 1/4 of a mile behind me. That was fun!

I climbed about 1200 feet over 4.5 Miles in about 40 mins.


This is the Northeastern view of Verdi in the foreground and Reno in the background.

This is the Northern view from the trail.

Smoke and smog made for a hazy sunset. I am pleased to report that the Bronco did great! There was nothing I did that even remotely challenged it and 90% of the drive was done in 2WD. The 4WD section was probably a 2 on the difficulty scale, but not bad for a stock 26 year old Bronco! I did Baja speeds down the service road and rattled the snot out of it. Lot's of fun, lots of dust in the cab, but no damage, no over heating, no issues with the tires. Just some desert pinstripes.


Up Next...

Phase 1 Wrap Walkaround

 The "Daaad! this is SO Embarrassing!" Phase is Complete I wrapped up the passenger side today Before After The damage and wear on...