Squeezing in Some Work Before Winter
So I planned on having all of this finished before the big club run on the 27th (next weekend) and I began ordering parts a month ago... But, I apparently I still haven't learned my lesson when it comes to timing. The plan was to have the bumper on by now and the interior finished by midweek. That doesn't appear to be possible at this point. I prepped the Bronco interior and pulled the old bumper weeks ago. Here's where I started...

The rear bumper was seriously out of whack after the last run up Peavine Mtn. and needed to be replaced.

I got the bumper off and got a little silly with my angle grinder and cutoff wheel. The rust is almost complete on the bottom of the tailgate and it too will need to be replaced... someday.

I gutted the interior and masked off the areas I didn't want covered in primer and Lizard Skin. I covered the door cards too, but after this photo was taken.

I cleaned, sanded, cleaned... degreased, and prepped the metal. I sprayed the epoxy primer yesterday. I also coated the door sills and corners of the rear passenger floor pans with POR15 to stop and prevent rust.
I decided to go with the Rock Solid Bumper by Protofab4x4.com. It is a 108lb 1/4" plate steel beast!
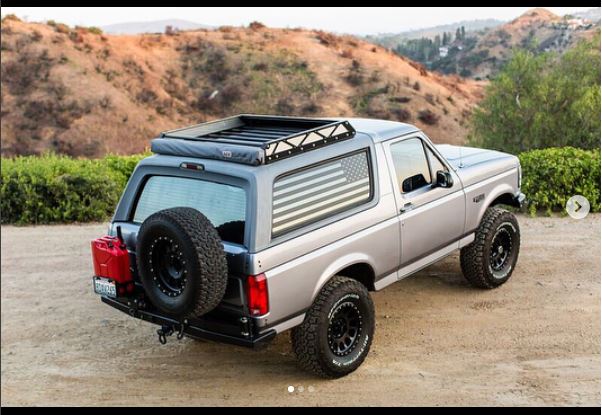
Unfortunately, the tire rack and jerry can version would have taken too long to build, so I decided I'd retrofit them later on.

I sprayed the primer yesterday.

This is the finished underside of the bumper. I used Raptor Liner with an HPLV spray gun and a 2mm tip. I really like the texture! Here's a close up...

I saw a gal on youtube called Unstoppable Morgan do an American Flag headliner for her Bronco and decided I'd give it a shot myself. This is called Kyptek Typhon and it is a specialized camouflage that matches the black and grey motif already in my Bronco.

A little 3M headliner and fabric adhesive, my wife's ironing board and iron and there ya have it! I need to tough up a few areas where not enough glue was used, but otherwise this should look pretty cool! I'll be using vinyl wrap with the same pattern for the top of the dash and some of the dash trim. A company also makes custom fit seat covers in this pattern, but I am not sure if that will be a little too much Typhon. We'll see.
Up next...
I'll post the bumper and Lizard Skin results later this week.


No comments:
Post a Comment
Note: Only a member of this blog may post a comment.